HOW TO CREATE A BLOG POST ON WORDPRESS
By Jonathan Calix.
This is a short tutorial of how to create blog postings on your website, from the beginning to the end. Follow these steps and get your first blog up and running in no time.
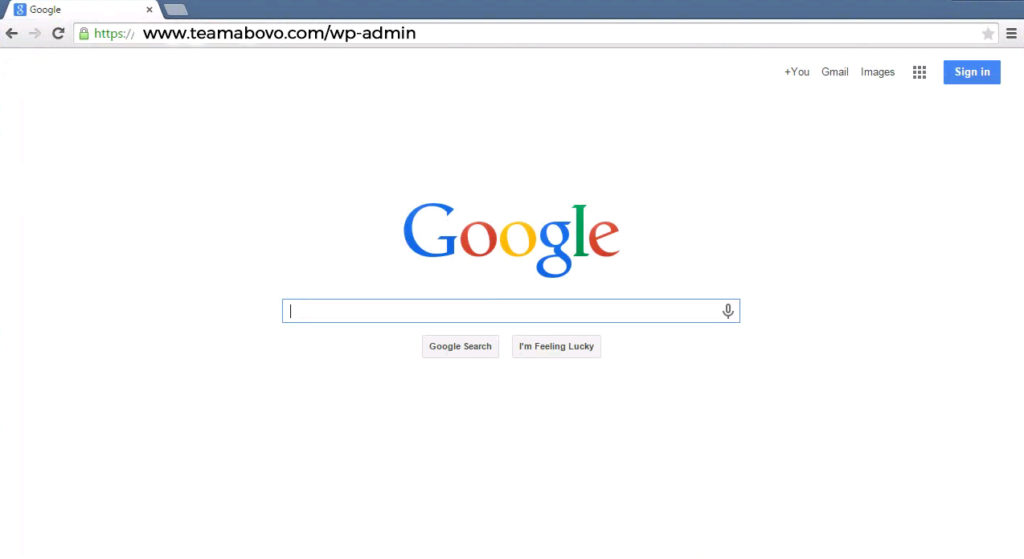
1- Open any web browser (we recommend Google Crome or Firefox) and type your website URL. For example www.teamabovo.com (You should type your own URL). After your full URL is in place, type the following “/wp-admin“. Your final URL will look like this www.your-own-url.com/wp-admin. Now that the entire URL is typed, you can go ahead and press Enter/Return.
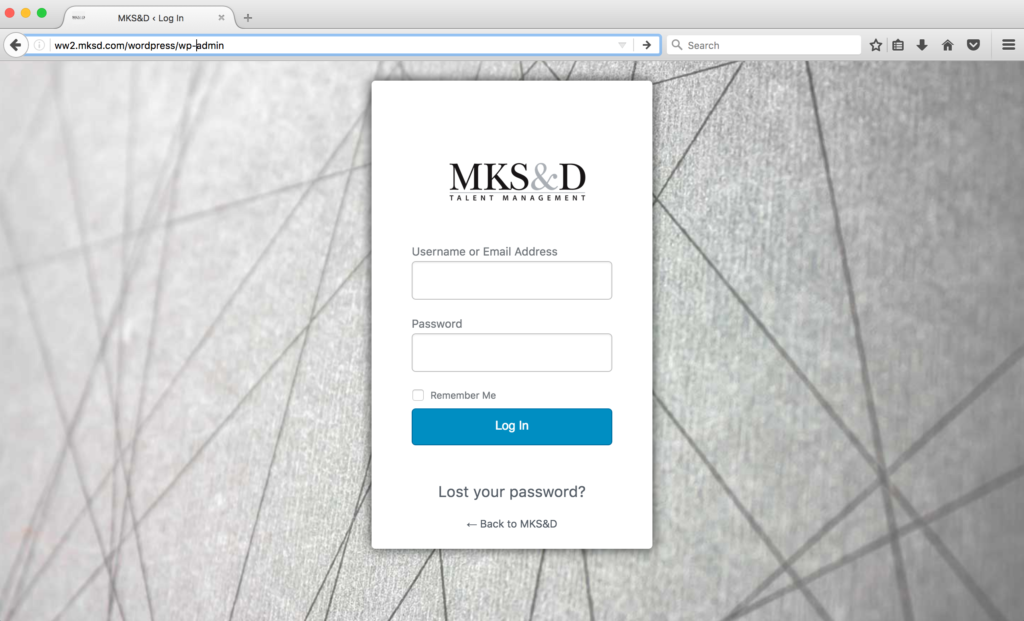
2- The next screen is the log in page. Here you will enter your credentials (user name or email and your password). After all the credentials are in place, click the LOG IN button.
3- After step 2 you will be redirected to the Dashboard of your site. Don’t worry we are almost there.
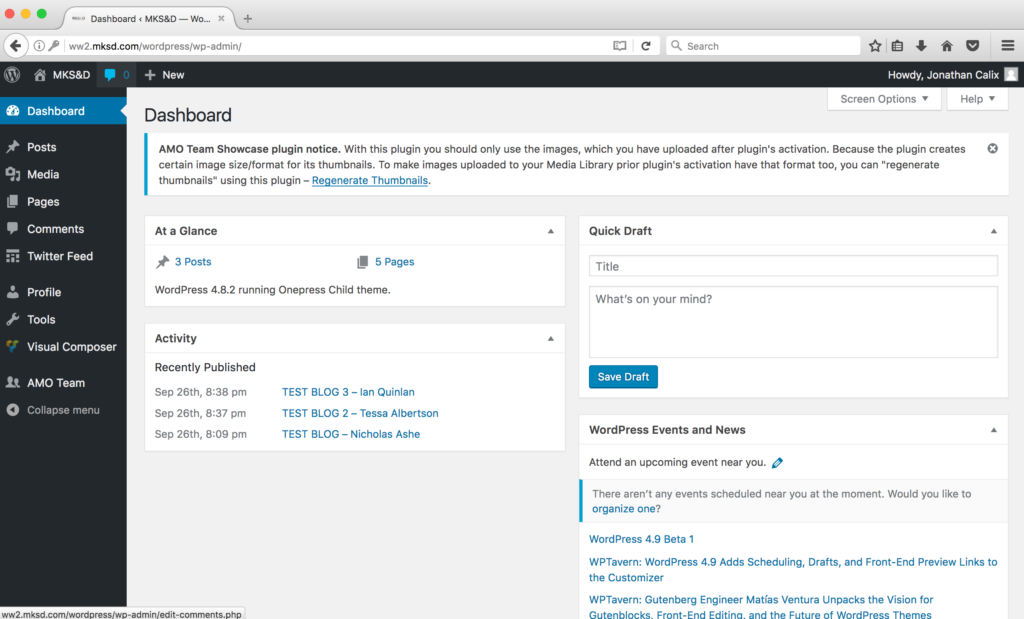
4- Go to the navigation bar on the left and hover over POSTS. A submenu will pop up and you can click ADD NEW (this will create a new empty blog post for you).
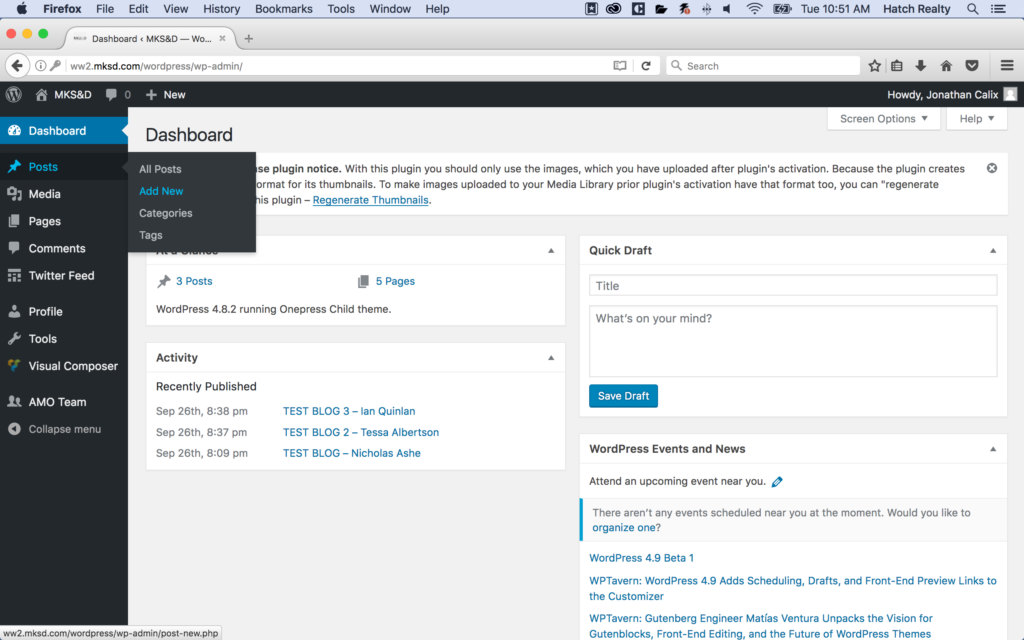
5- Let’s create a new blog post. Enter the title and your content in the designated areas.
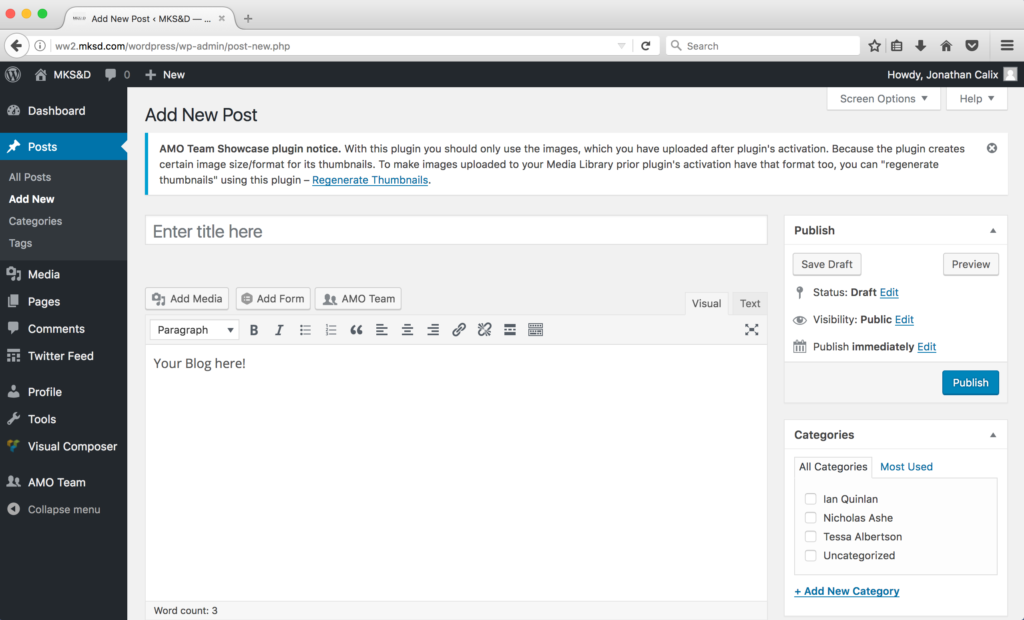
6- After you are done writing your blog, go ahead and add a NEW CATEGORY. Go to the righthand side navigation bar under the categories module and click on +Add New Category. The name of the new category should be the name of your client. If this client category has already been created, go to the next step.
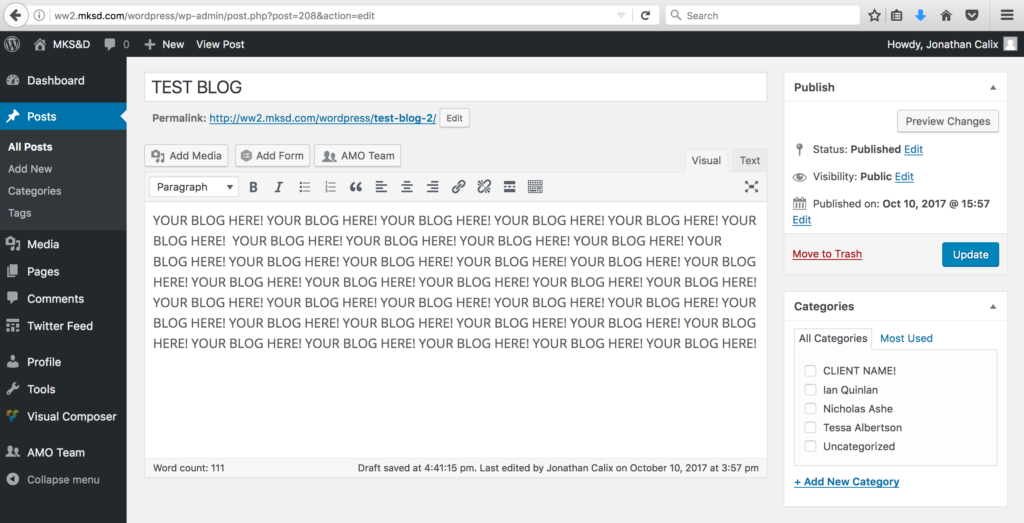
7- After you create your category make sure to select the category by clicking on the box to the left of the category title, as shown in the following example. A blue checkmark will appear when a category is selected. Go to the next step.
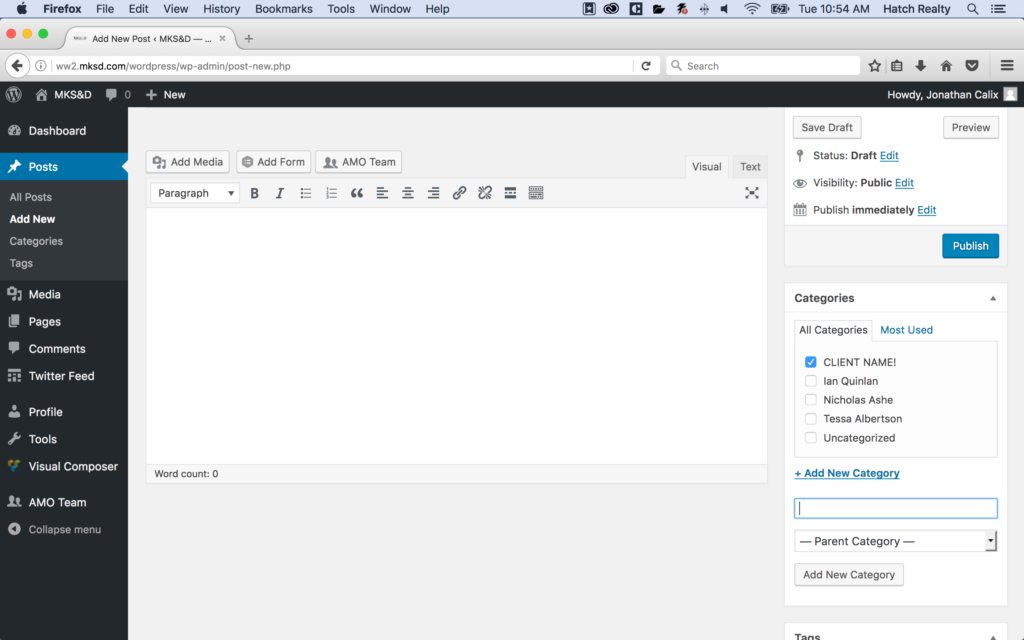
8- At the bottom of the page on the righthand side navigation bar click SET FEATURED IMAGE.

9- Click UPLOAD FILES (top left corner)
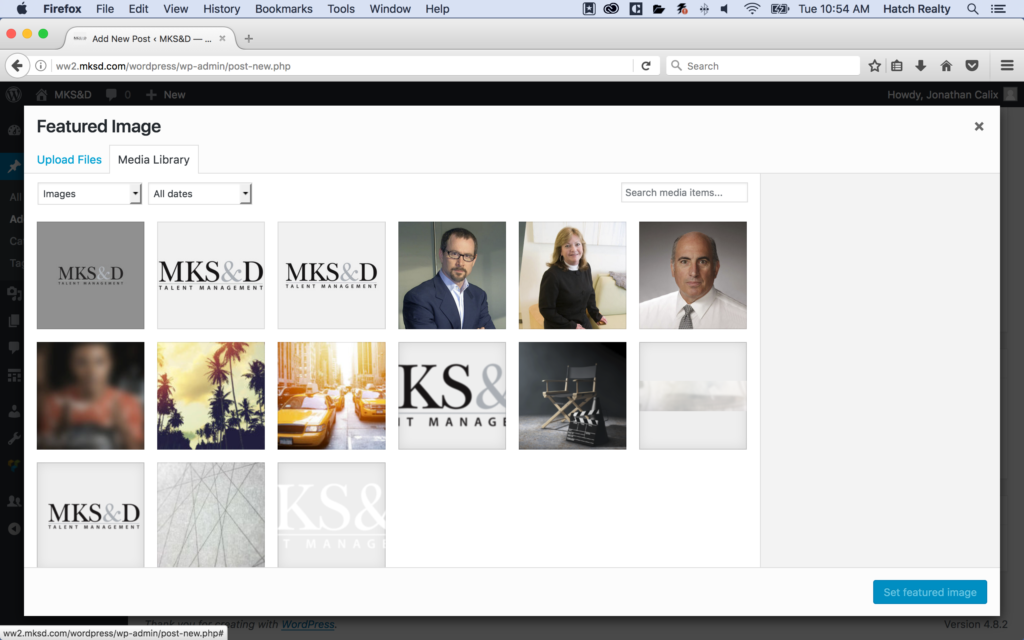
10- Click SELECT FILES or drag and drop your images (we suggest an image size of 600×300 pixels to keep the style and uniformity of the blog).
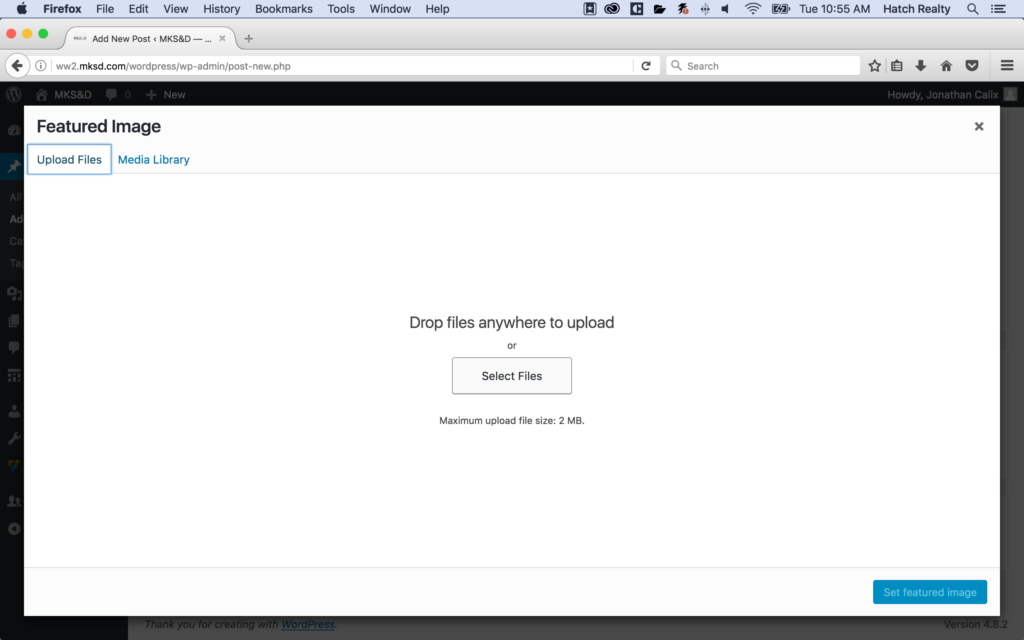
11- After the image is uploaded, select it by clicking on the photo (it will look like the following graphic). Once the image is highlighted, go ahead and click the blue SET FEATURED IMAGE button in the lower right corner.

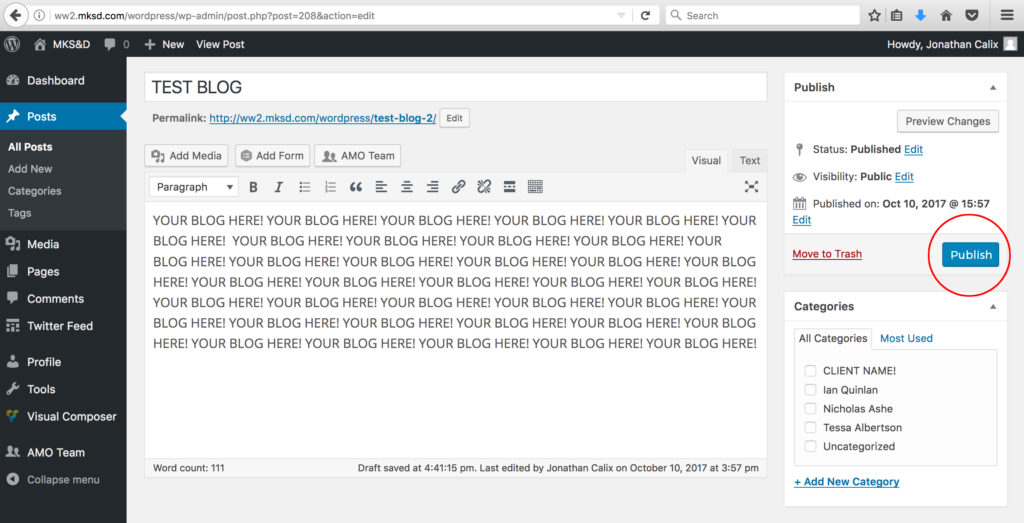
12- Good Job! You made it. All that is left to do now is click the PUBLISH button and your blog will go live on your site.
